
Docs › Events: from RSVP to sold out
Events: from RSVP to sold out
Pro and upCreate events, sell tickets into your own Stripe, ask guests questions, and cap the room.
Creating an event
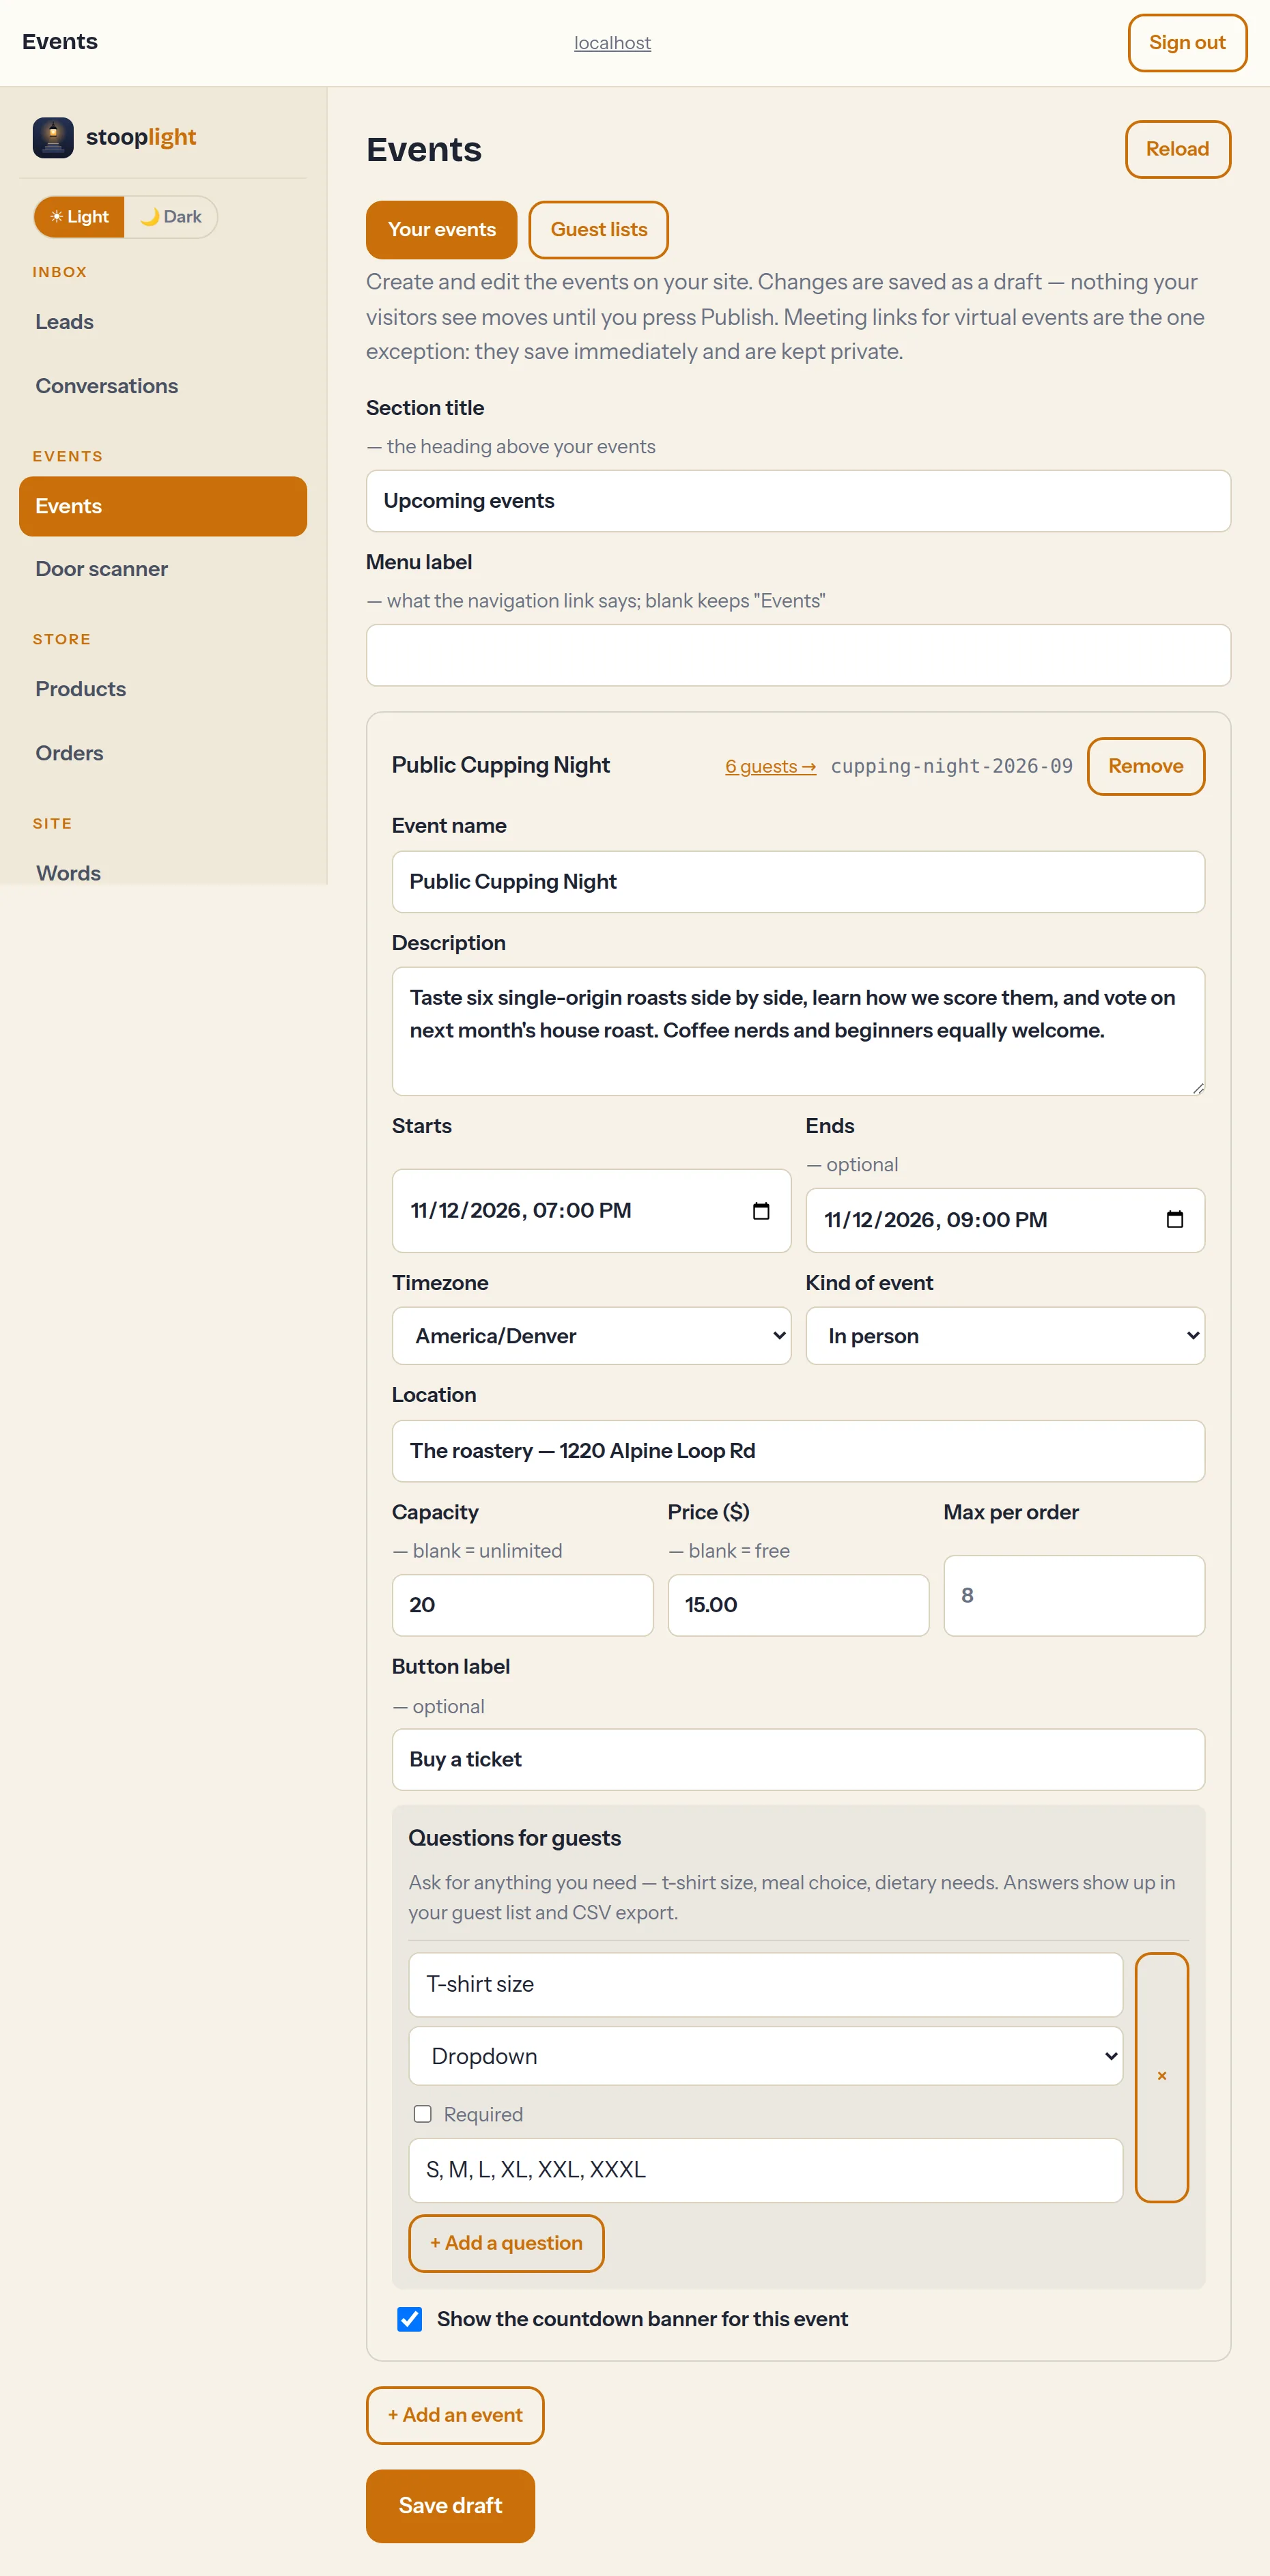
- Open Events and add an event: name, description, date and time (in the event's own timezone), and location.
- Pick the type — in person, online, or hybrid. Online and hybrid events get personal join links that only open shortly before start.
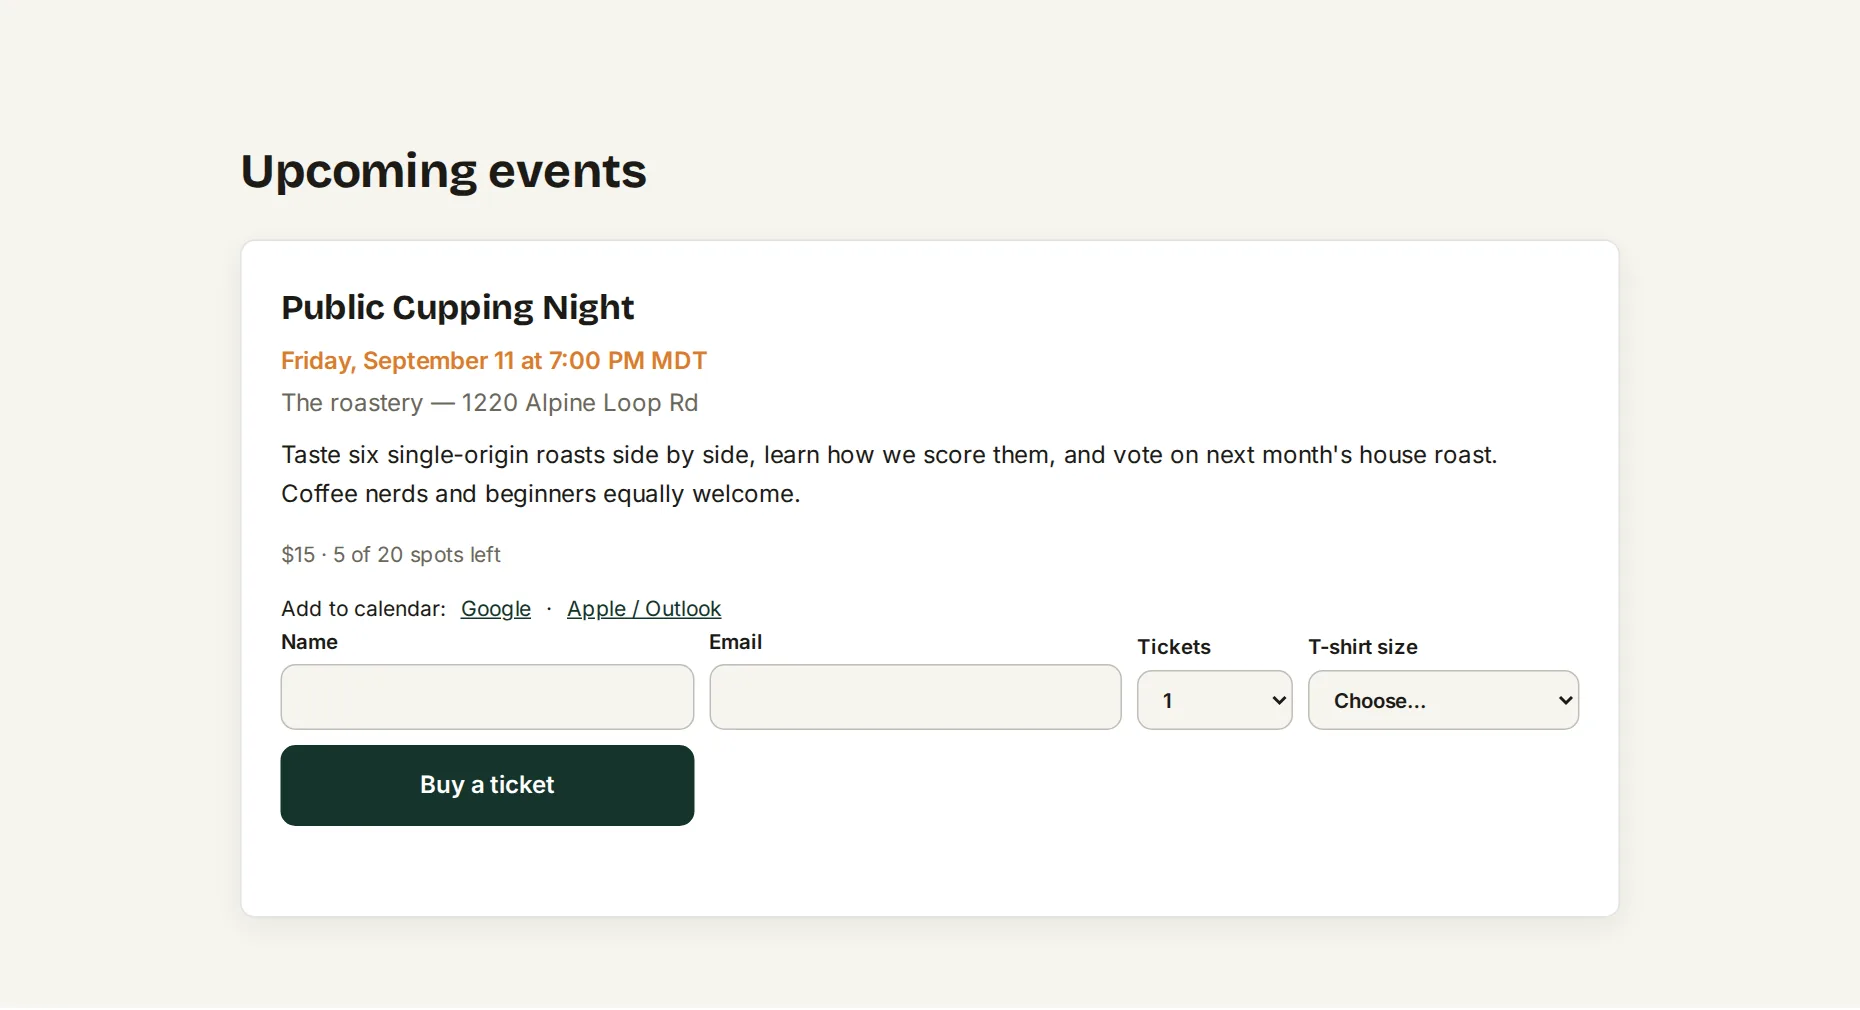
- Optional: capacity (the site shows “X spots left” and stops overselling), a price (paid tickets go straight into your connected Stripe account), a per-order ticket limit, and the countdown banner toggle.
- Add questions for guests if you need anything at RSVP time — meal choice, t-shirt size — as short answers, dropdowns, or checkboxes. Answers land in your guest list and CSV export.
- Save, preview, publish. Each event card shows its live guest count — tap it to jump straight to that event's guest list.
Tickets
Every RSVP or purchase emails the guest a ticket with a QR code — one per seat, and orders can hold several seats. Paid checkout happens on Stripe's hosted page; you never touch card numbers.
Tip: The countdown banner is per-event: pick one headliner and toggle it on in that event's settings.