
Docs › The shop: sell products
The shop: sell products from your site
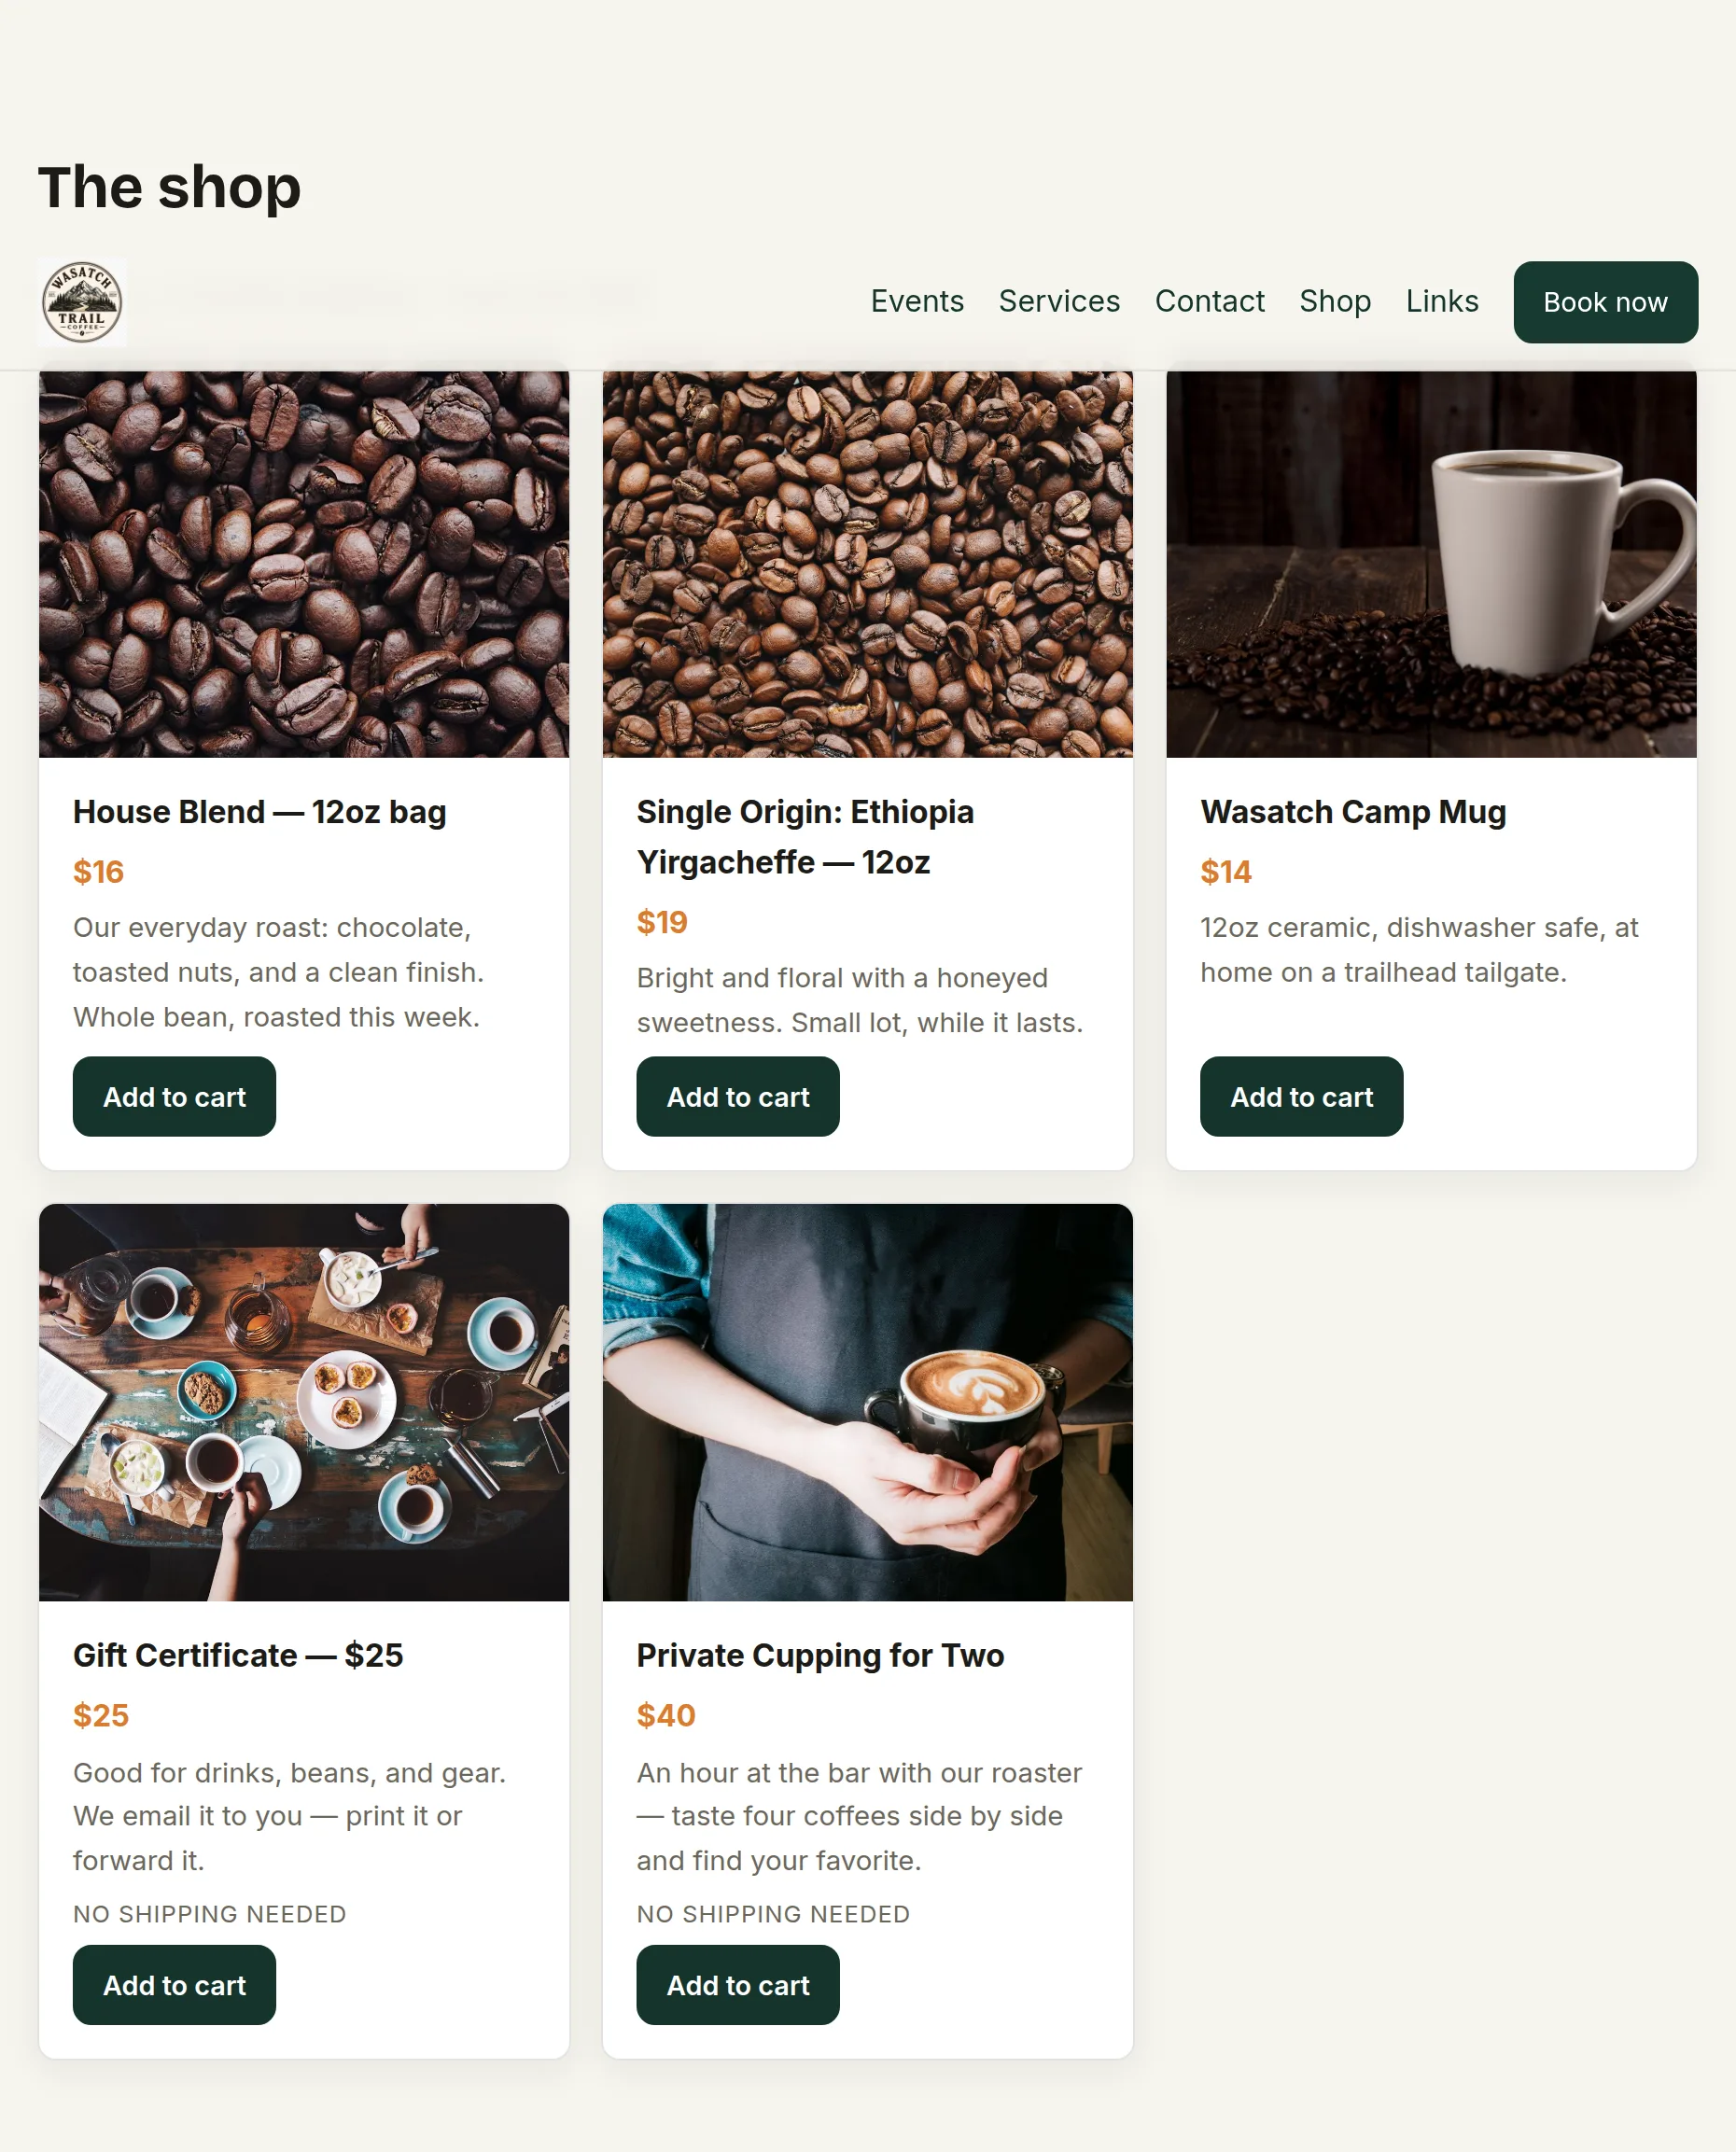
Pro and upUp to 50 products with photos and prices, a real cart, and card payments that land straight in your own Stripe account. Gift certificates and services work too.
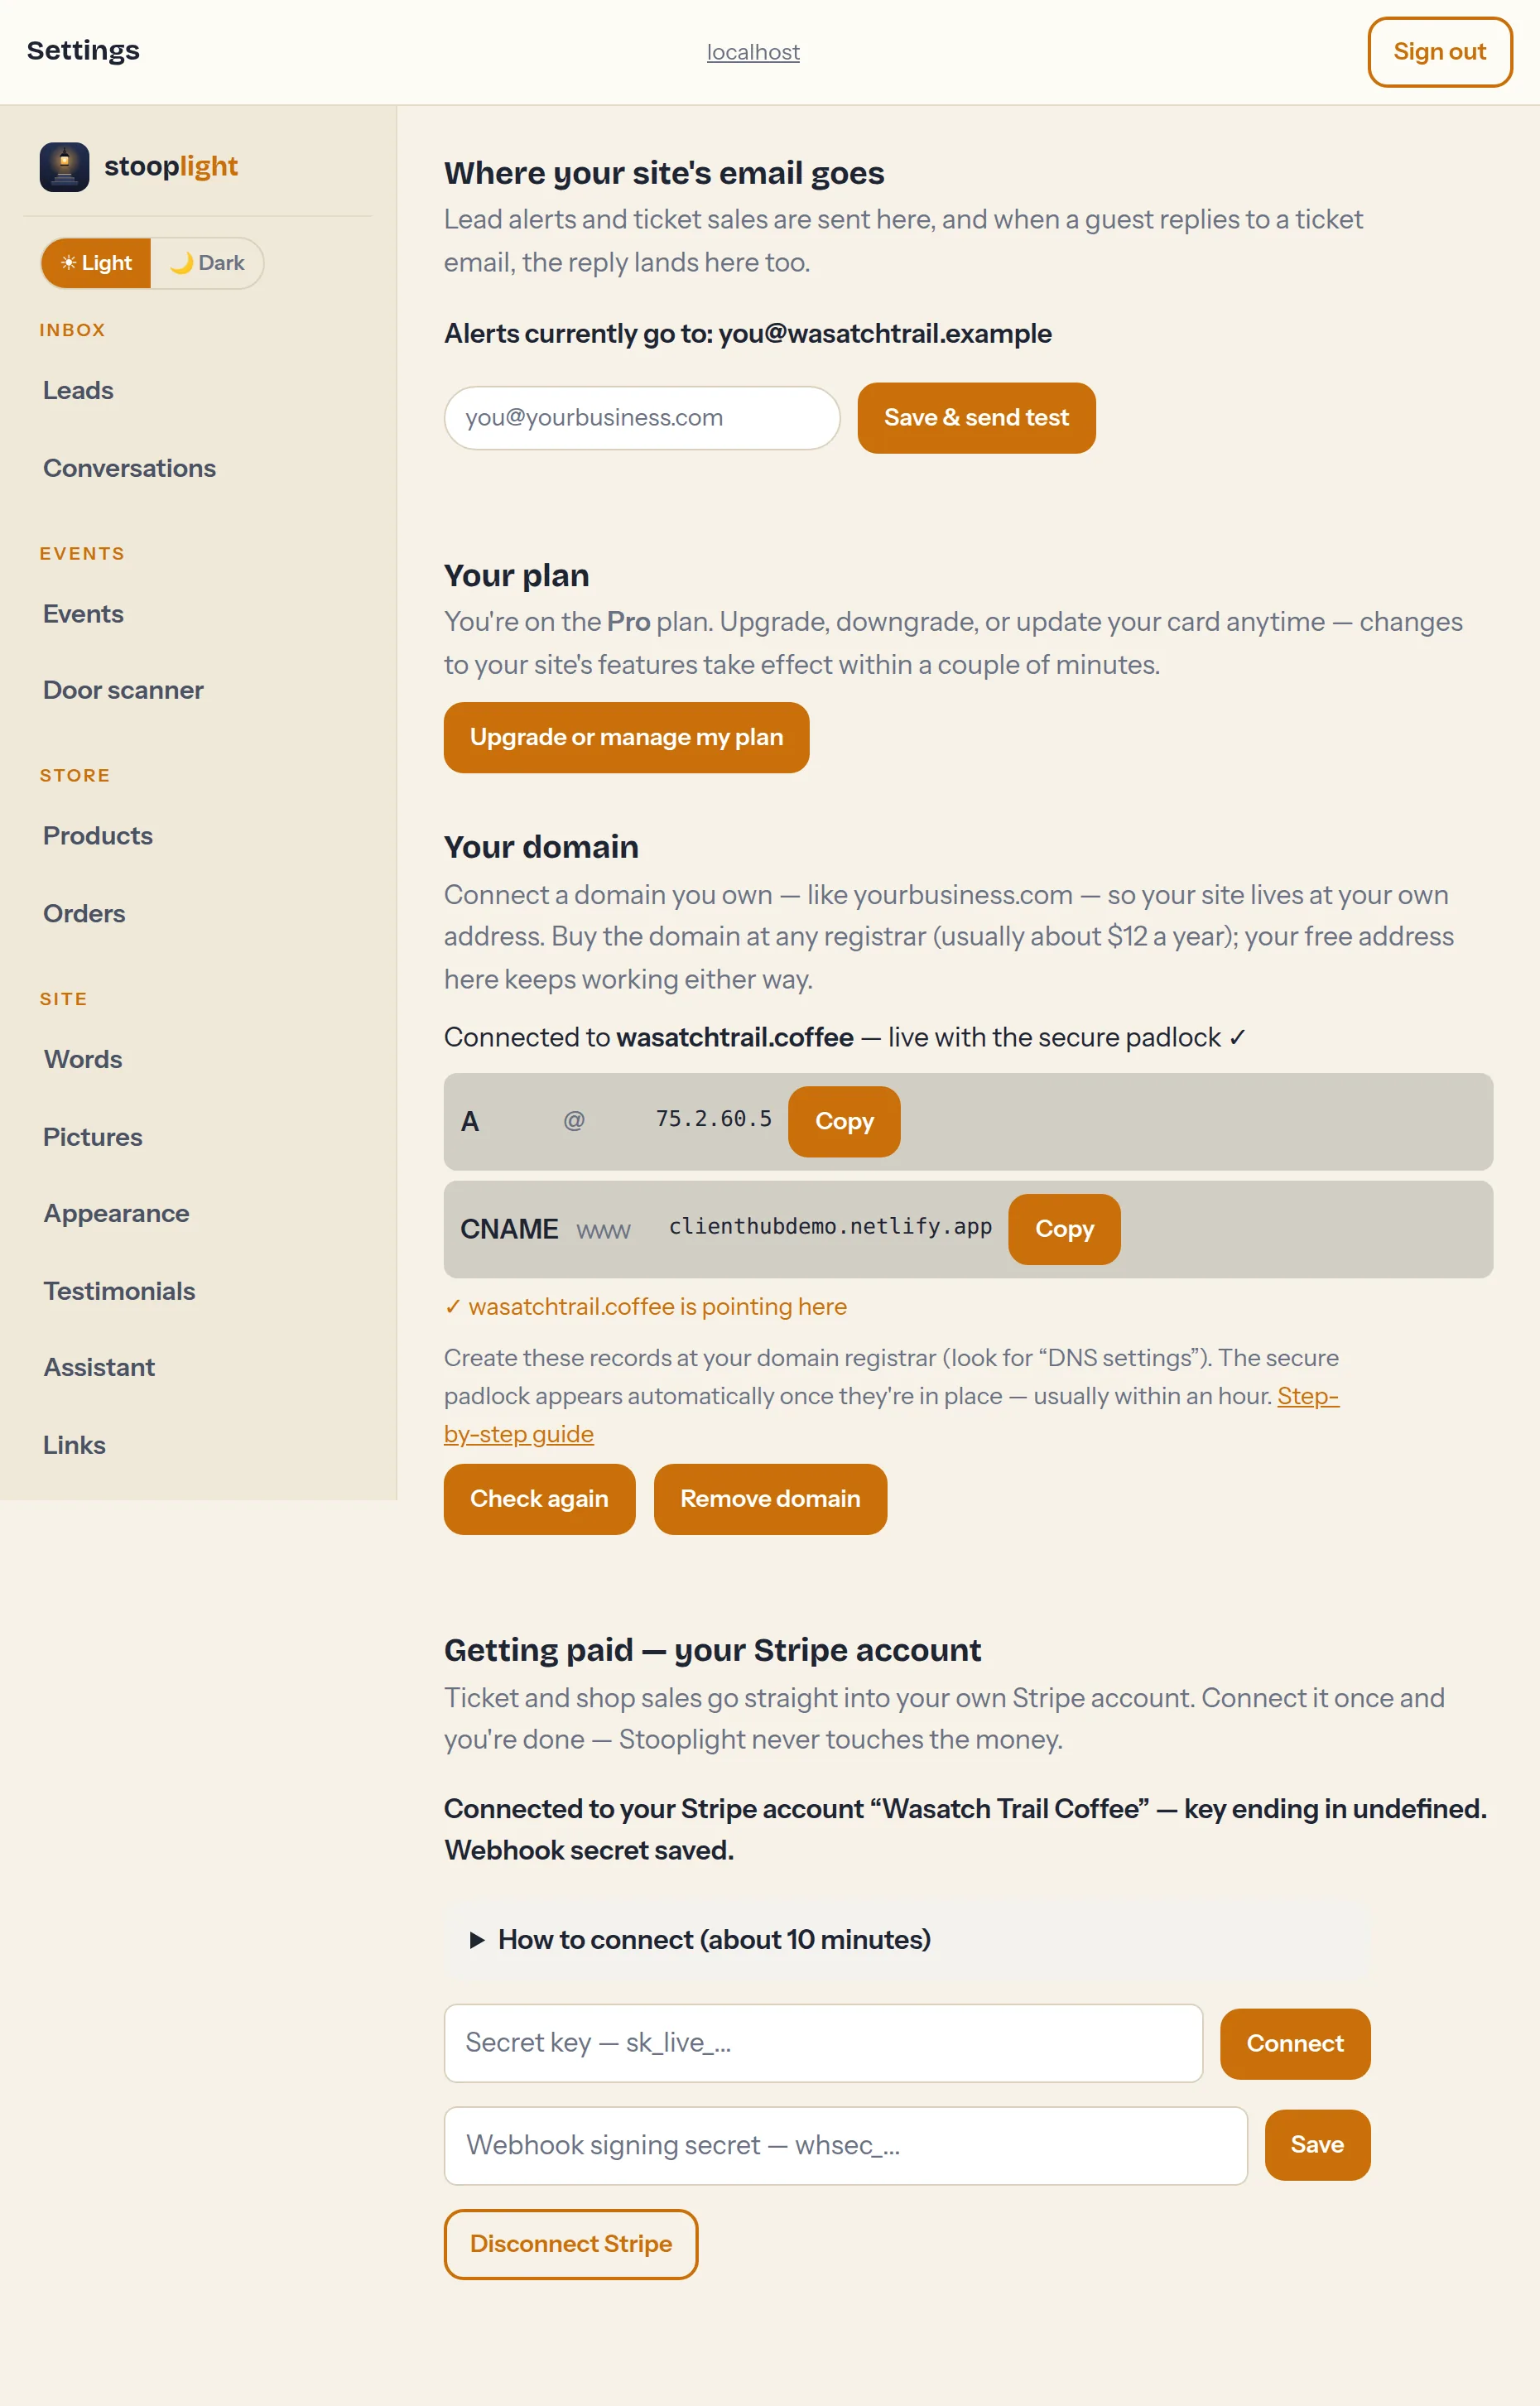
First: connect your Stripe account
The shop takes card payments through your own Stripe account — the money never passes through us. That means Stripe has to be connected before the shop can sell anything. It's a one-time setup, about ten minutes, and it's the same connection that powers paid event tickets — if you already sell tickets, you're done and can skip to adding products.
- In your dashboard, open Settings and find the Getting paid — your Stripe account card.
- Follow the "How to connect" steps right on that card: create a free account at stripe.com (or sign in), paste in your secret key, then add the webhook with the URL the card shows you.
- When the card says it's connected, you're set. The Settings guide covers this screen in more detail.
Until Stripe is connected, your shop can be built and previewed but checkout will tell buyers payments aren't set up yet — so connect Stripe first and save yourself the head-scratching.
Add your products
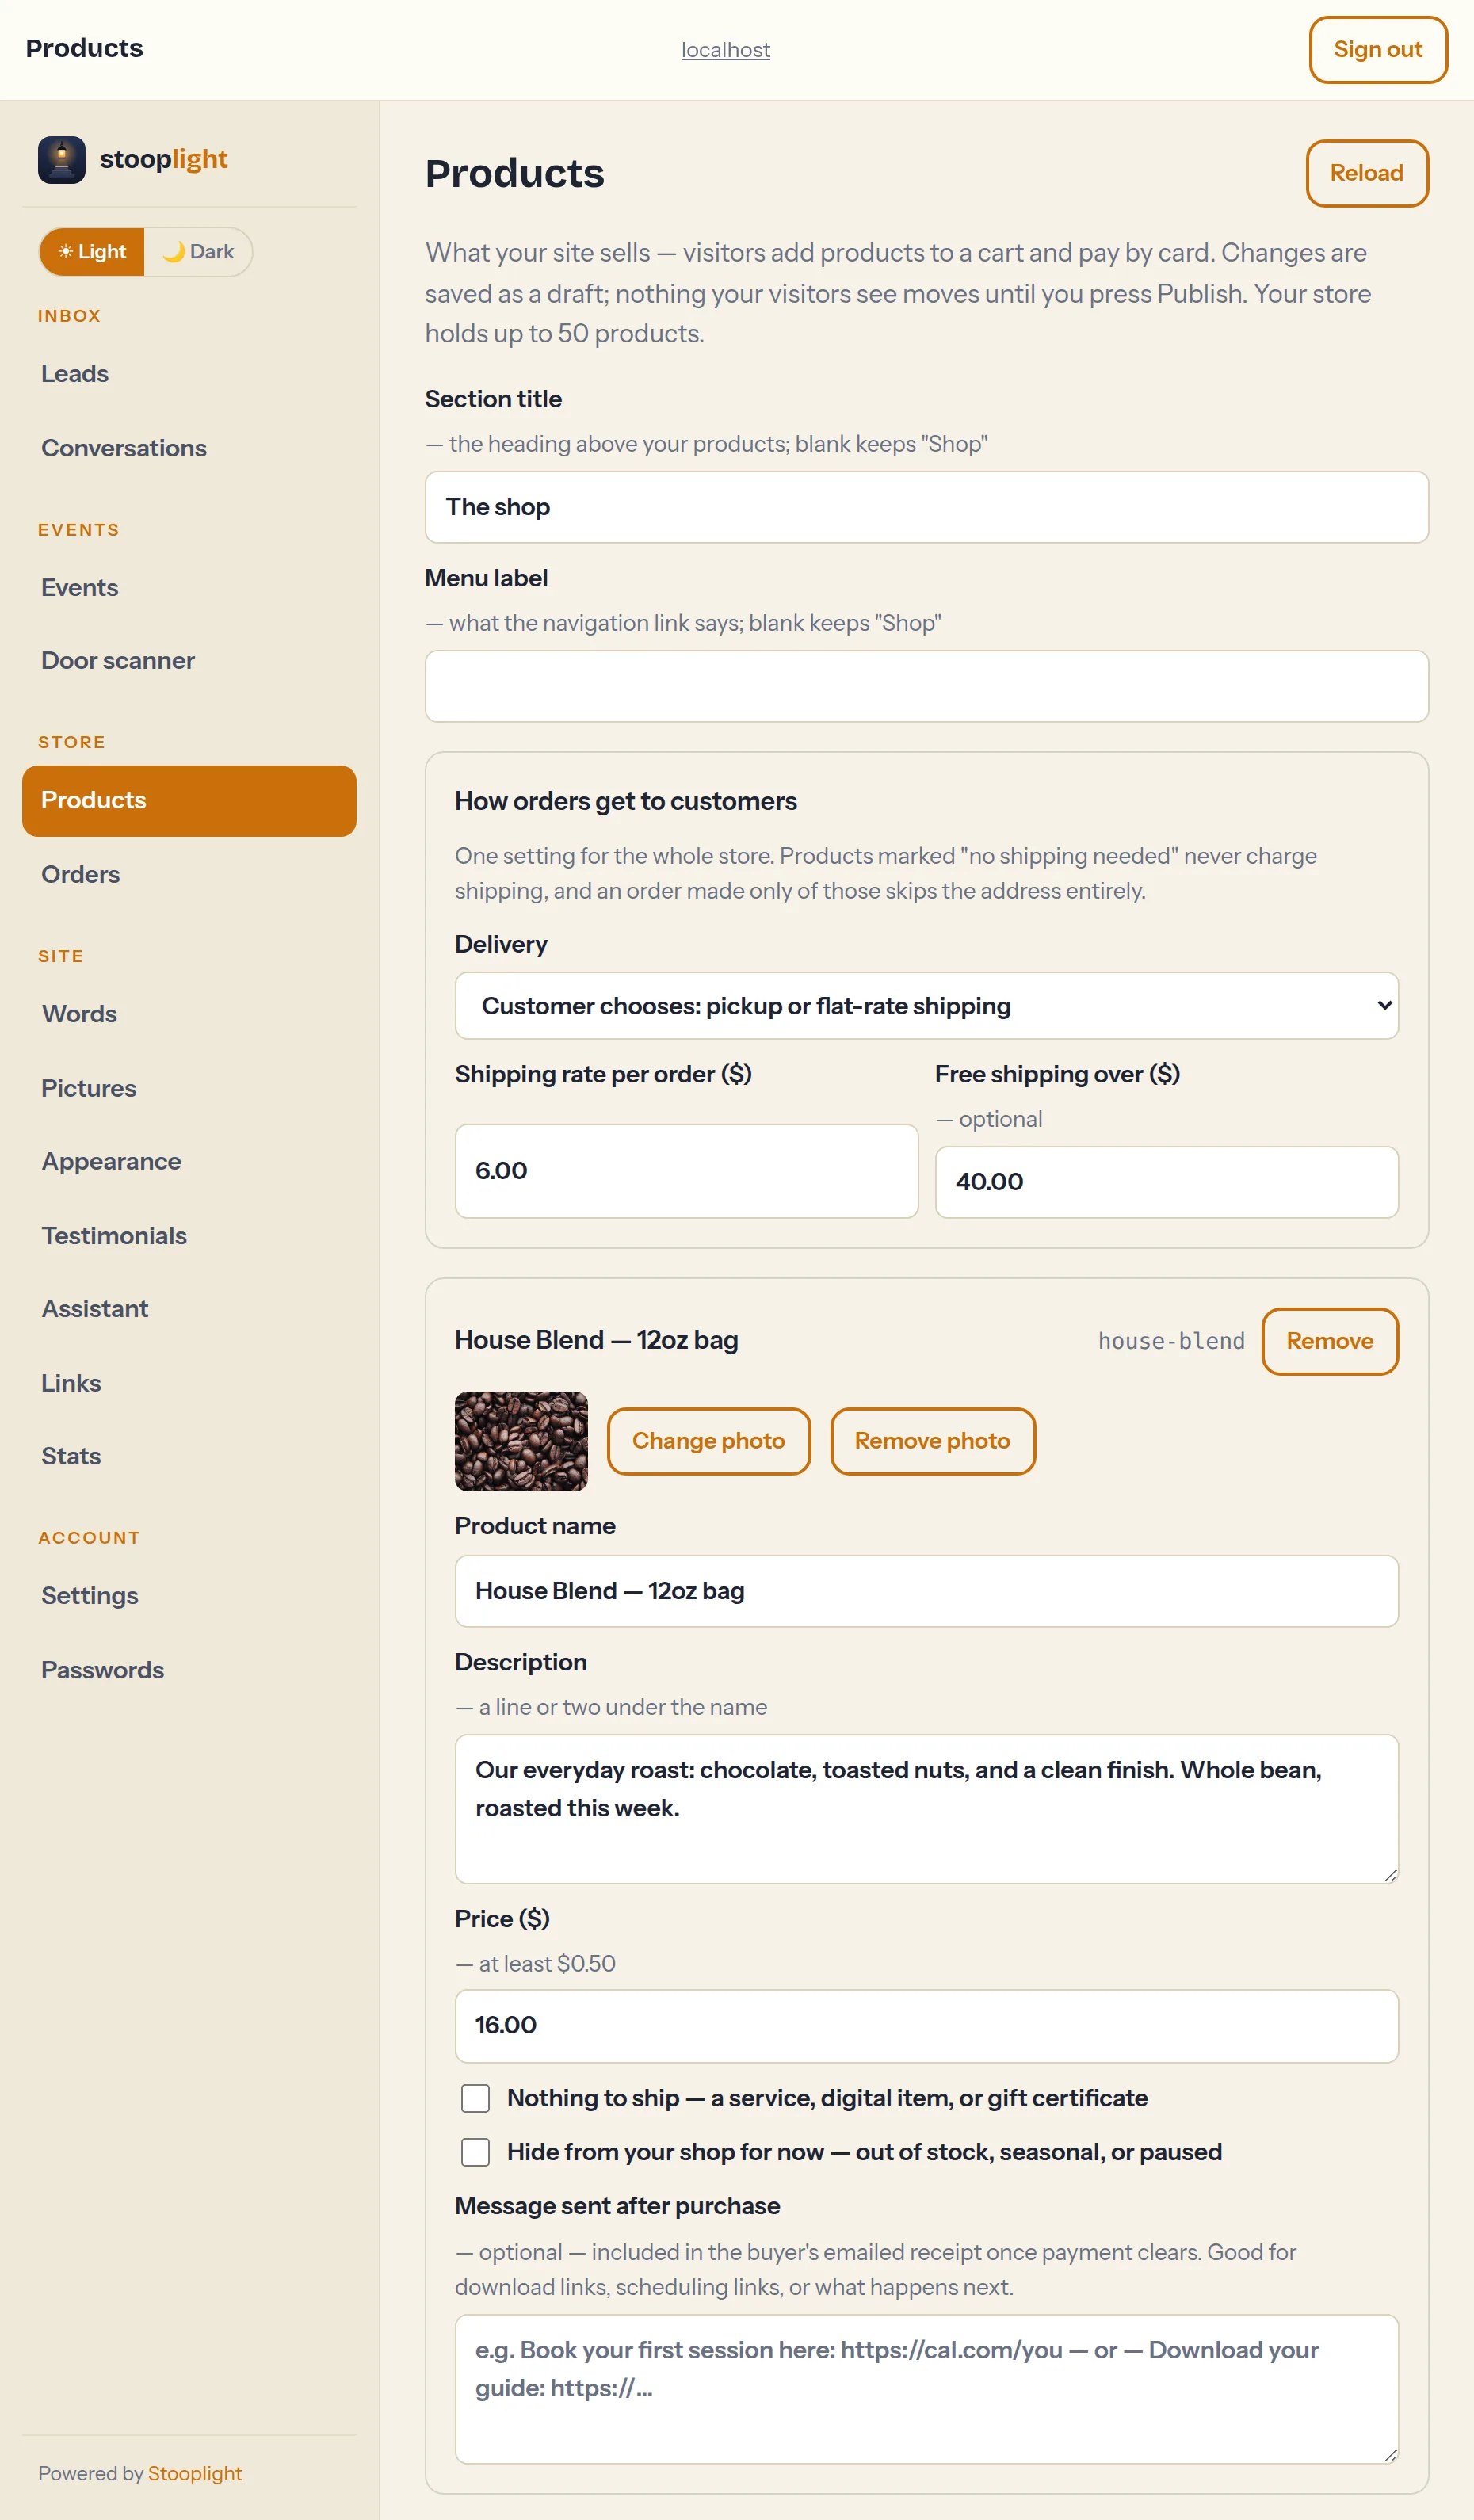
- Open Products in the dashboard (under Store) and tap + Add a product.
- Give it a name, a line or two of description, and a price (at least $0.50 — that's the card networks' floor).
- Tap Add photo to upload a picture — it's resized automatically, and products with photos sell better than products without.
- Tap Save draft, then Preview to see the shop on your site, and Publish when it looks right. Like everything else in the dashboard, nothing your visitors see changes until you publish — and version history has your back.
The shop section appears on your site automatically once your first product is published, with a "Shop" link in the menu. You can rename both — the Section title and Menu label fields at the top of the tab. Your store holds up to 50 products; the first 25 show right away and the rest sit behind a "Show more" button.
Choose how orders get to customers
One setting covers the whole store — the How orders get to customers card at the top of the Products tab:
- Pickup only — nothing ships; buyers collect their order from you. No address is asked for at checkout.
- Flat-rate shipping — one rate per order, whatever's in the cart. Set the rate, and optionally a free shipping over amount ("free over $40") — a nice nudge toward bigger orders.
- Customer chooses — checkout offers both pickup and your flat rate, and the buyer picks.
A flat rate per order is deliberately simple: pick a number that covers your typical package and move on. Nobody's building shipping zones on a Tuesday night.
Services, digital items, and gift certificates
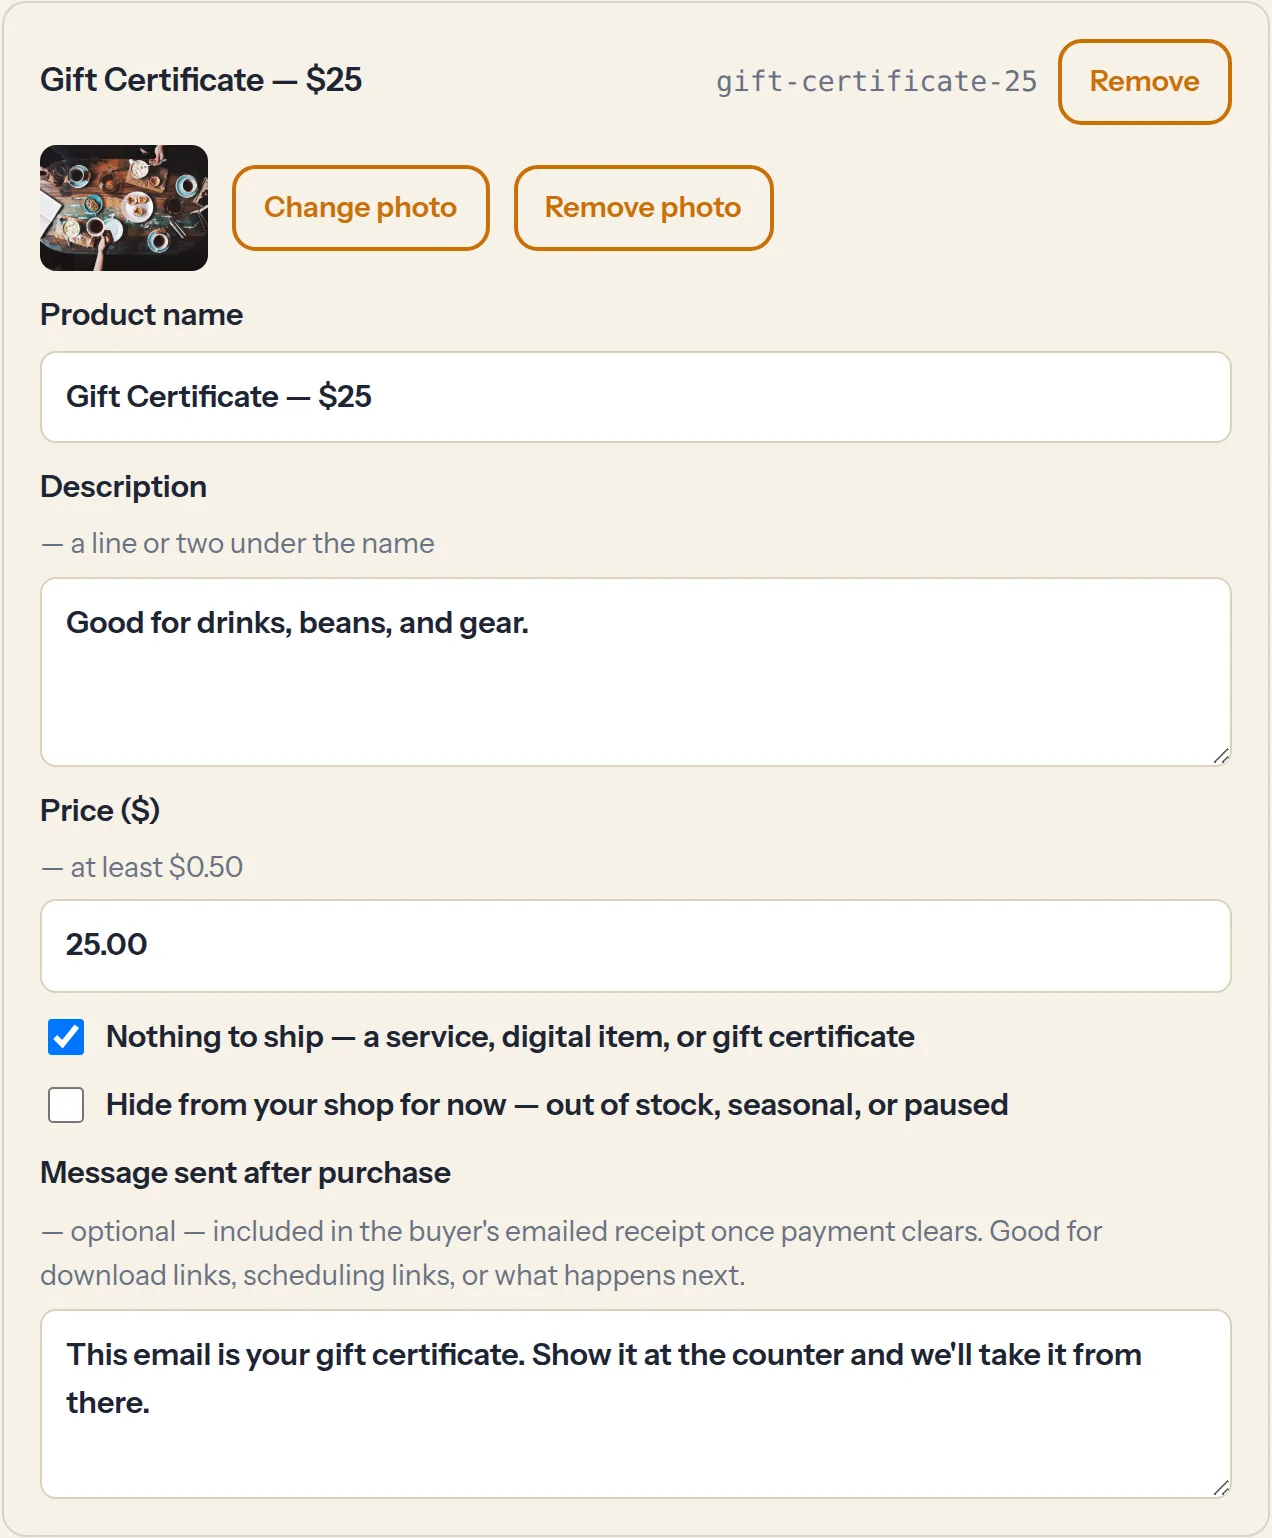
Not everything fits in a box. Two fields on every product handle the rest:
- Nothing to ship — check it for services, digital items, and gift certificates. These never charge shipping, and an order made only of them skips the address at checkout entirely.
- Message sent after purchase — whatever you write here is added to the buyer's emailed receipt for that product, once payment clears. A scheduling link for a session ("Book your first session here: …"), a download link for a guide, or how to redeem a gift certificate. Leave it blank and the item simply appears in the order summary.
That's how a coaching package, a PDF, and a bag of coffee can all sit in the same cart — each one's receipt block says the right thing, in your words.
Orders
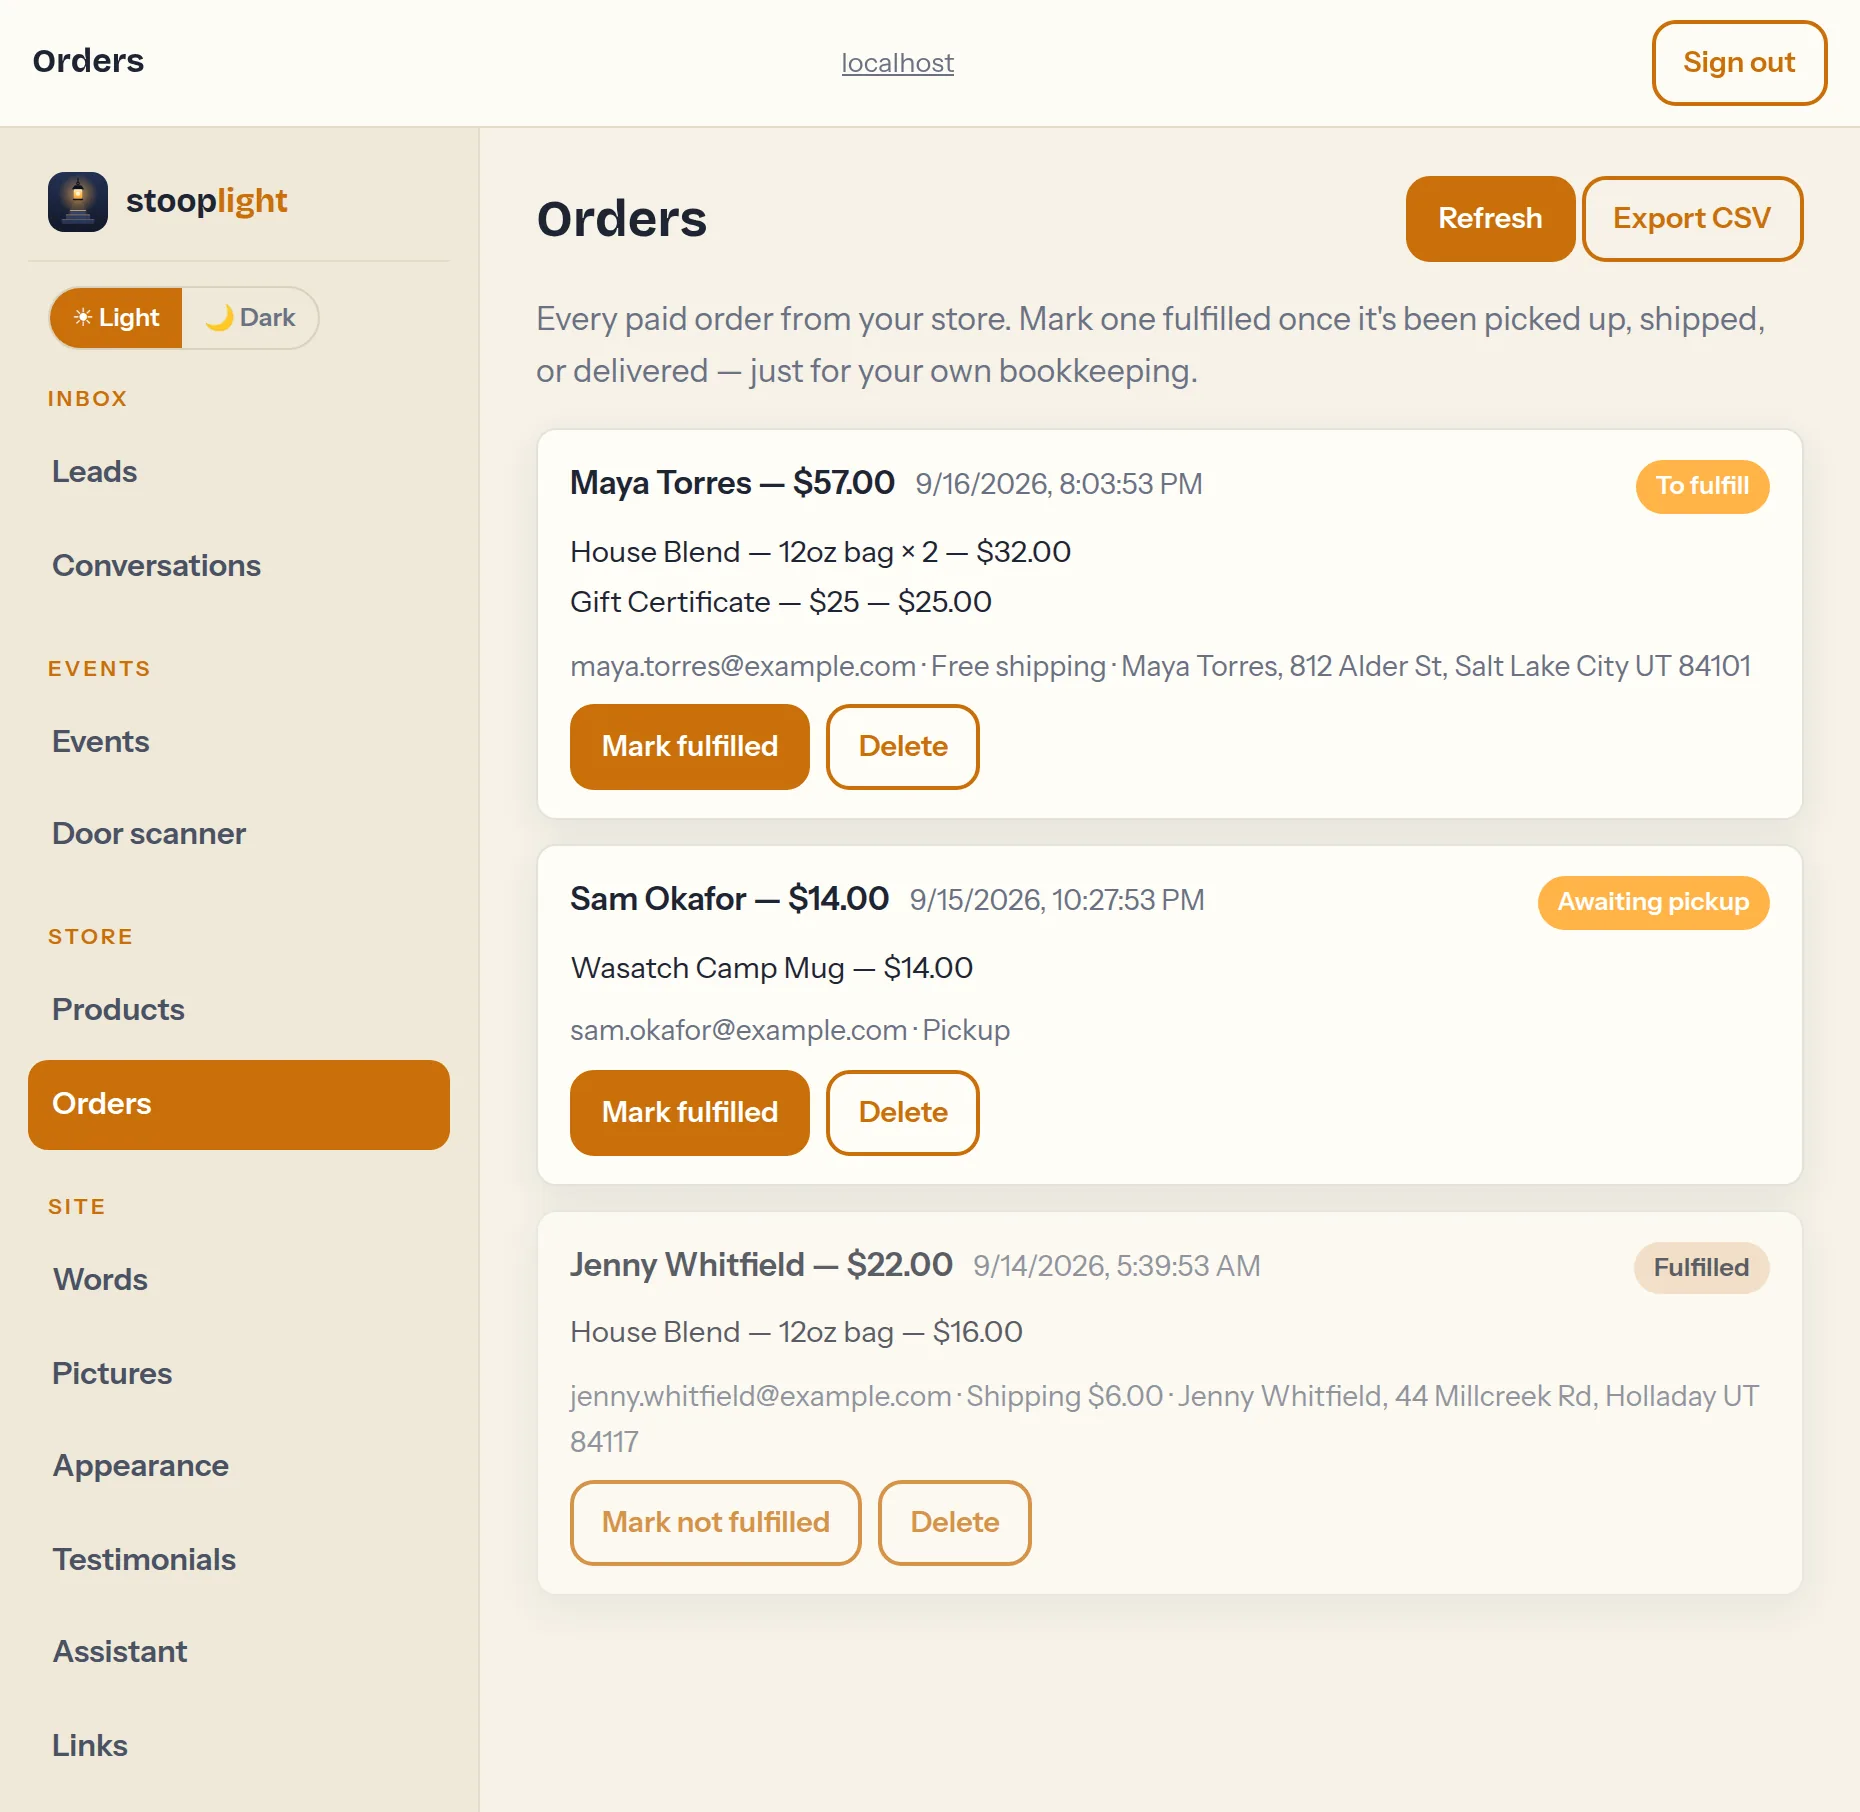
- Every paid order lands in Orders (under Store) — items, total, the buyer's email, and pickup or the shipping address.
- You also get an email alert for each sale, and the buyer gets an itemized receipt. Replies to either go to your alert address.
- Tap Mark fulfilled once it's been picked up, shipped, or delivered — just for your own bookkeeping.
- Export CSV downloads the list; Delete removes a record (handy for clearing test orders — the payment in Stripe is untouched).
Out of stock? Hide it
There's no inventory counting to babysit. When you run out of something — or it's seasonal — check Hide from your shop for now on the product and publish. It disappears from the site and can't be bought, but keeps its photo, price, and settings in your dashboard. More stock arrives: uncheck, publish, and it's back. Buyers with a stale cart just see "those items aren't available any more" instead of buying something you don't have.
The cart, from your buyer's side
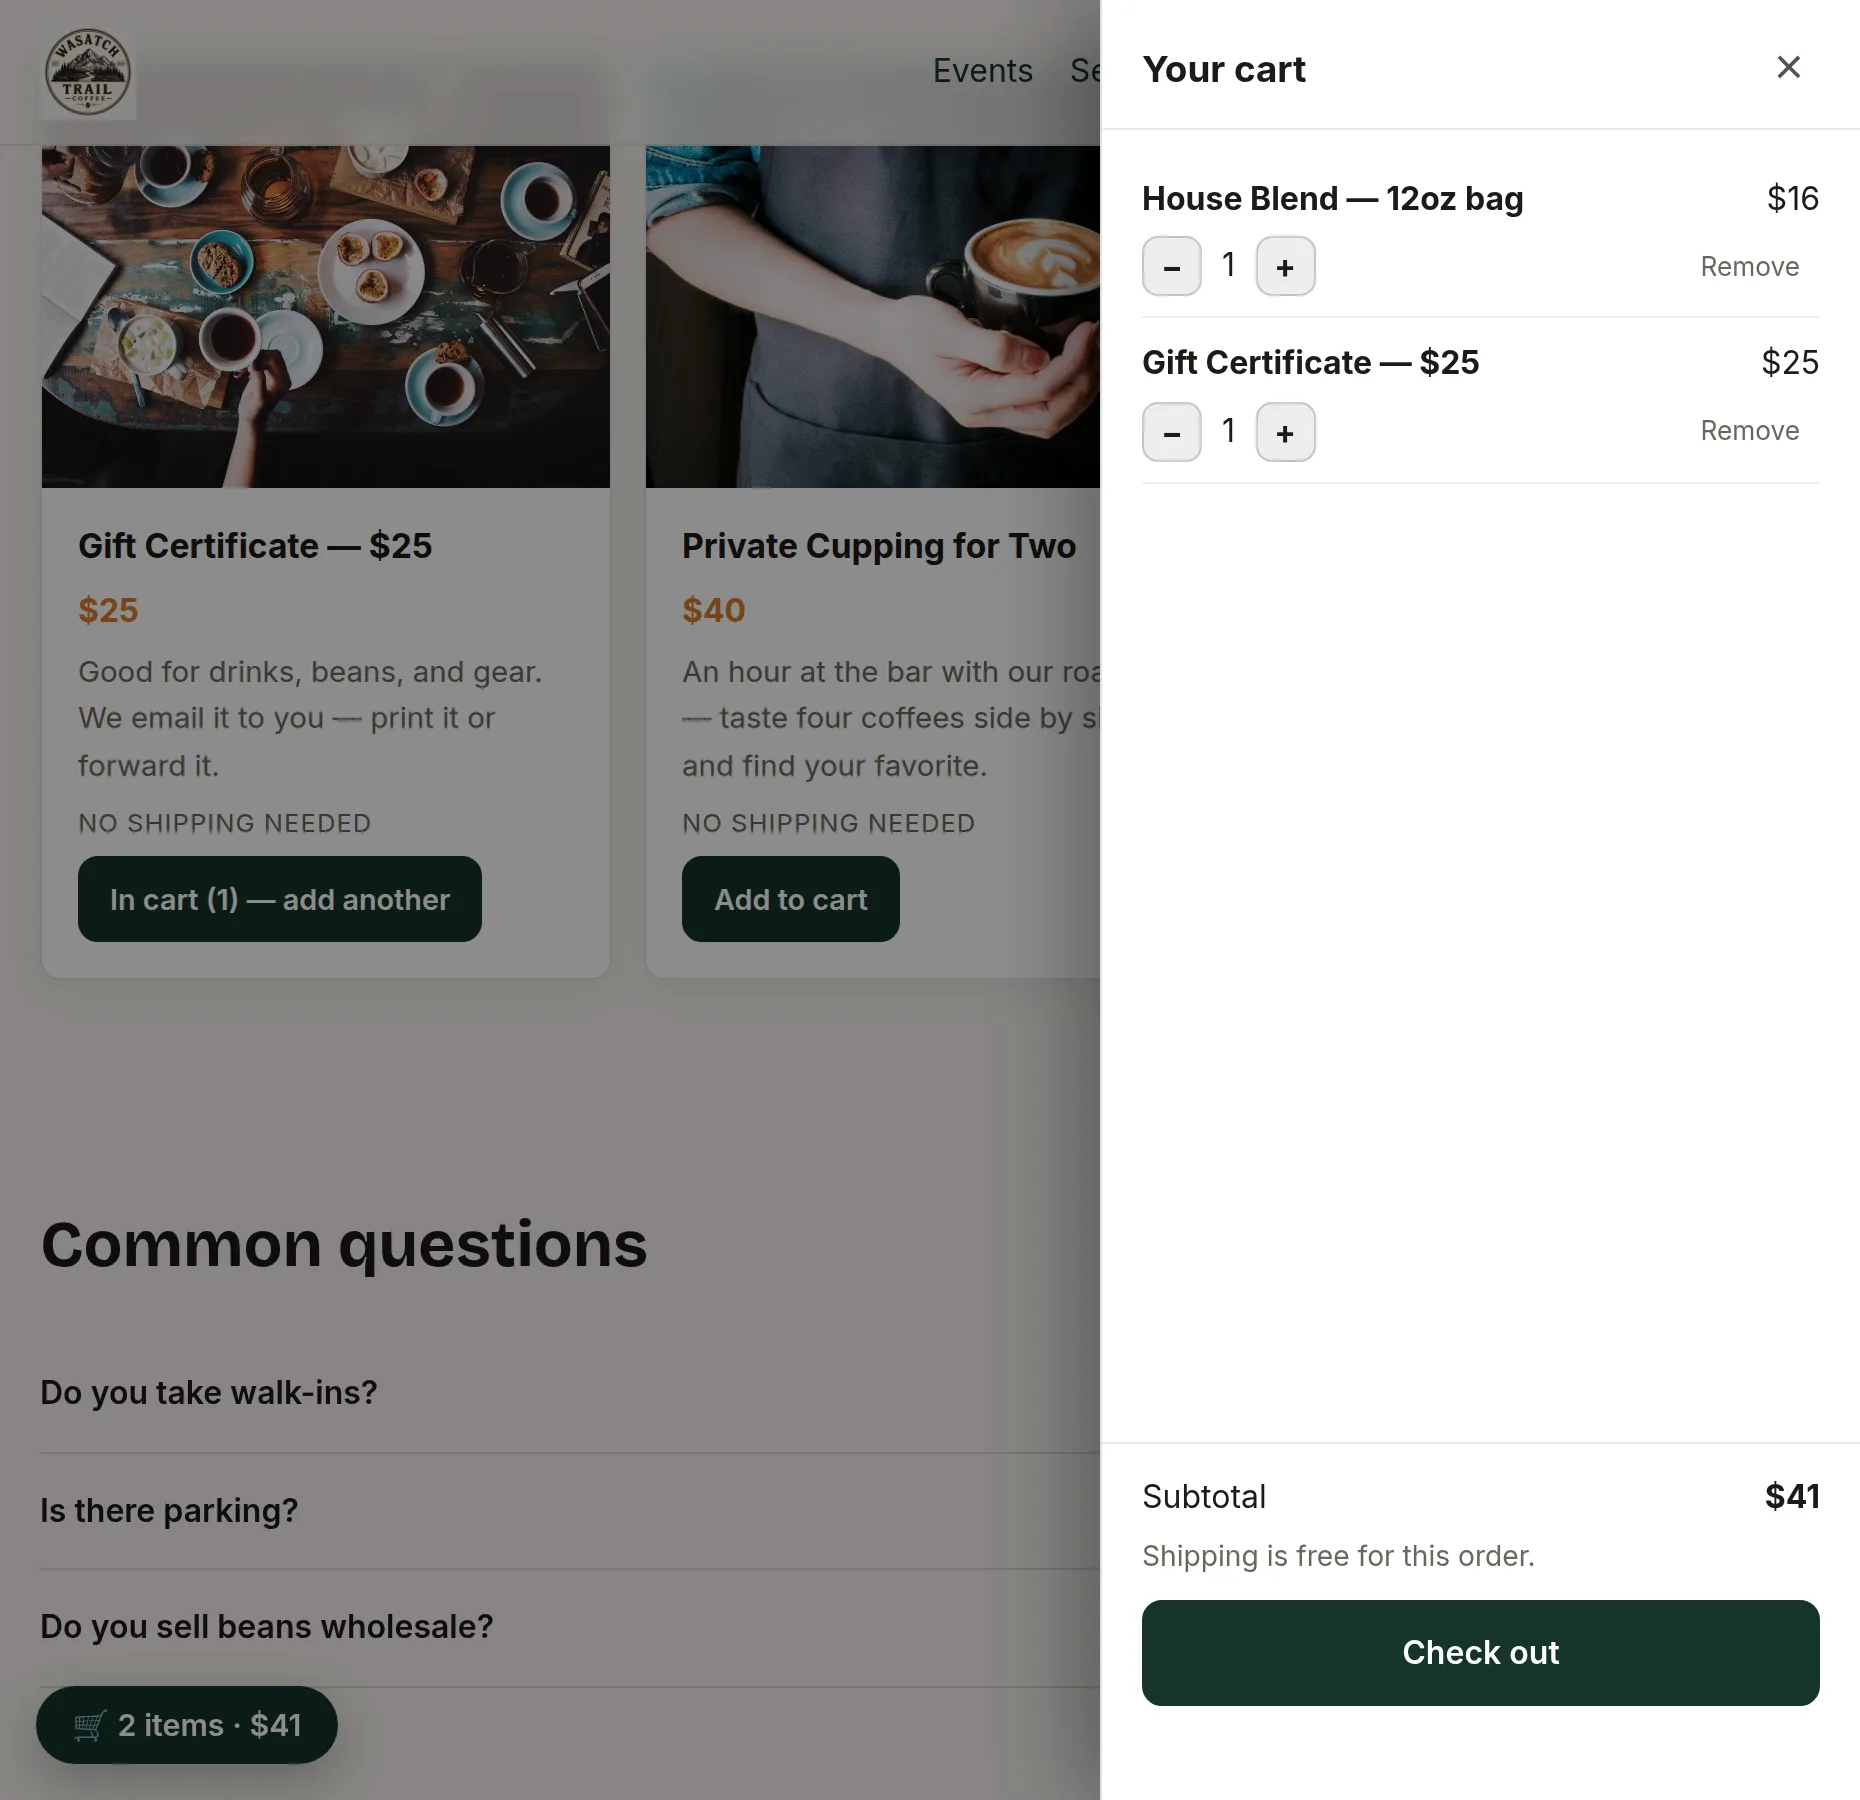
Buyers add items, adjust quantities in the cart drawer, and tap Check out — which opens Stripe's own secure payment page. Card numbers never touch your website. When payment succeeds they land back on your site with a confirmation, the receipt hits their inbox, and the order hits yours.
Want to try the whole loop without spending money? The Wasatch Trail Coffee demo runs its shop in Stripe test mode — buy something with card number 4242 4242 4242 4242, any future expiry, any CVC. A real receipt arrives and no money moves.